
Configure custom actions using Javascript
Empower your test automation with Custom JavaScript Actions
Sometimes specific test scenarios require automation approaches beyond standard recording capabilities. These limitations present obstacles to comprehensively covering critical application behaviors.
With Custom JavaScript Actions, you can test advanced use cases by executing tailored JavaScript functions within your tests. This enables robust automation coverage even for unsupported or unique scenarios.
Add custom actions
You can find the new custom actions step in the more menu. Click the ︙ icon from the recorder panel and select the Custom actions (JavaScript) option.
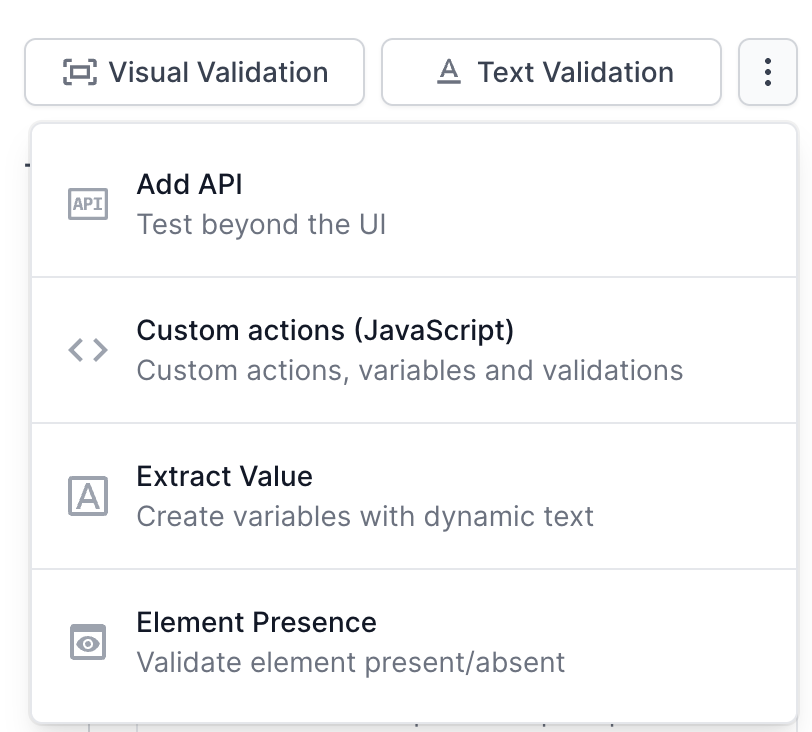
The following 3 options are provided when adding a custom action:
- Custom action
- Create variable
- Custom validation
Custom action
This option lets you perform any action by executing a JavaScript snippet on the webpage. This is similar to executing JavaScript in the console tab. For example, window.location.reload().

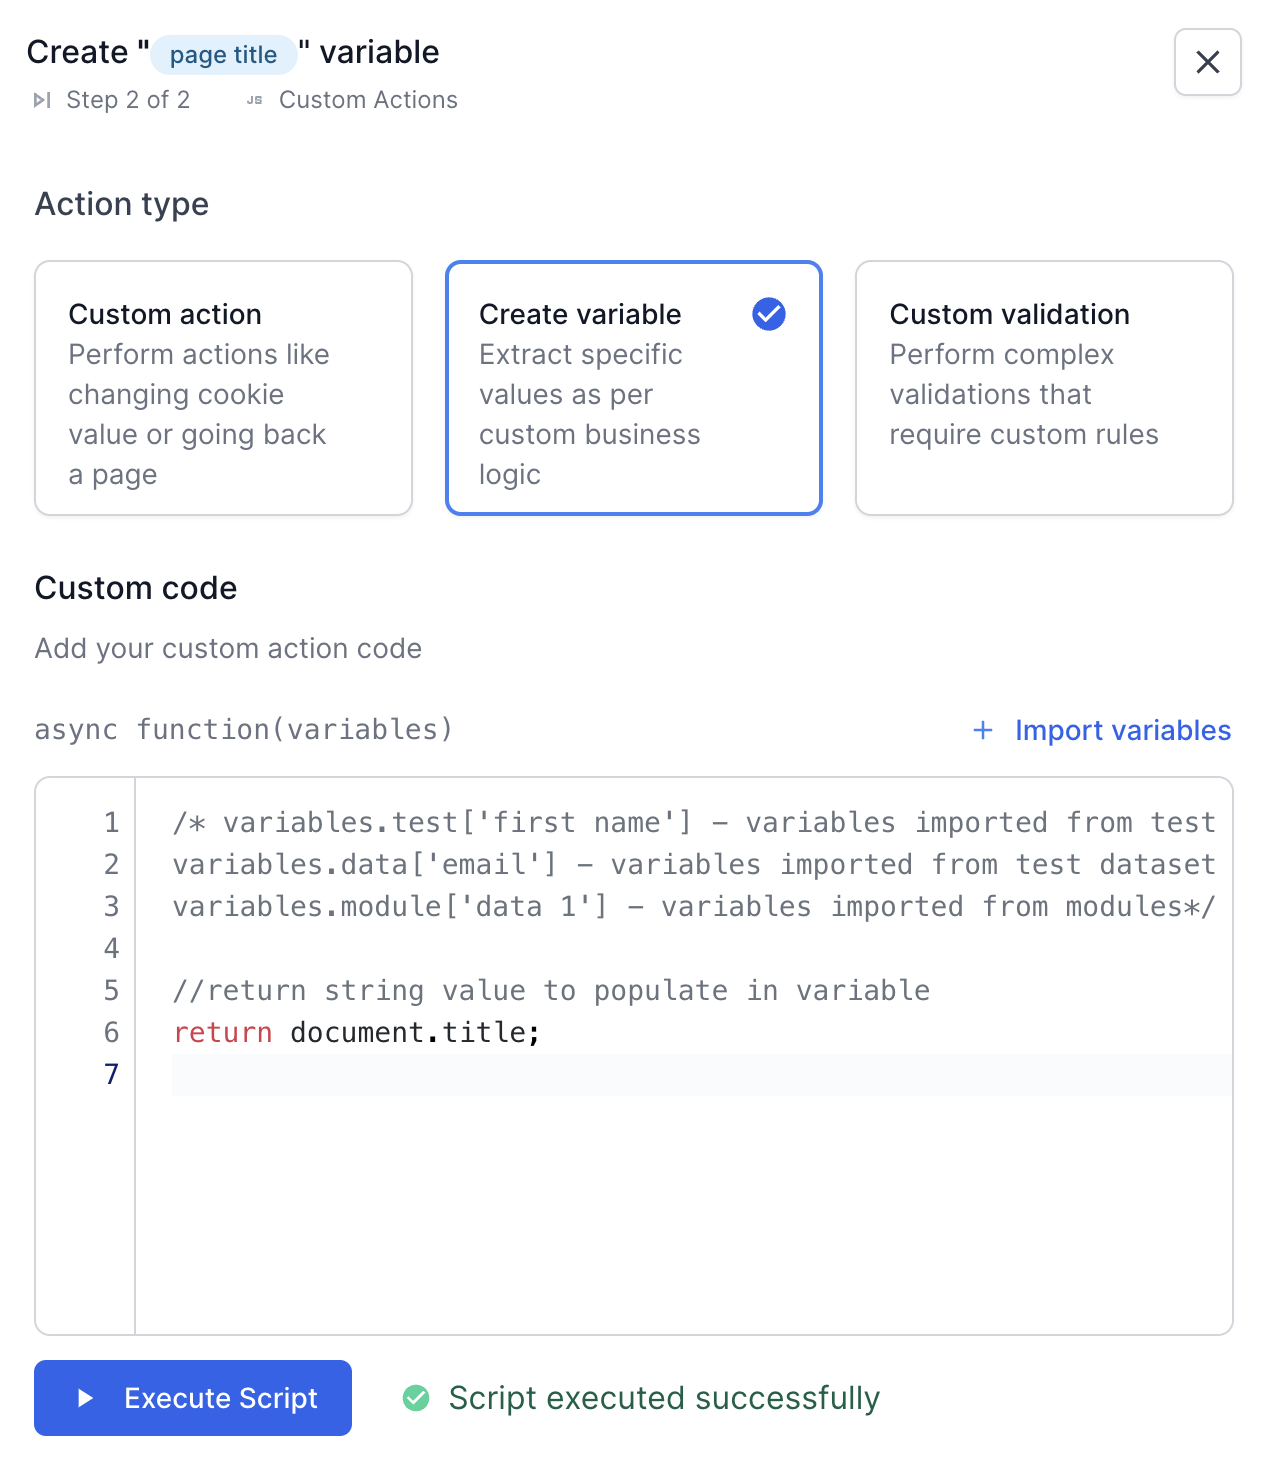
Create variable
Use this option to generate a string value using JavaScript. Return a string value, which will be stored in a variable with a name you provide. You can import the variable into any of the following steps.
Custom validation
Use this option to implement validations that require complex logic, where the recorder’s validation features are not sufficient. The function should return a true or false value. True means the validation passed and false means the validation failed.
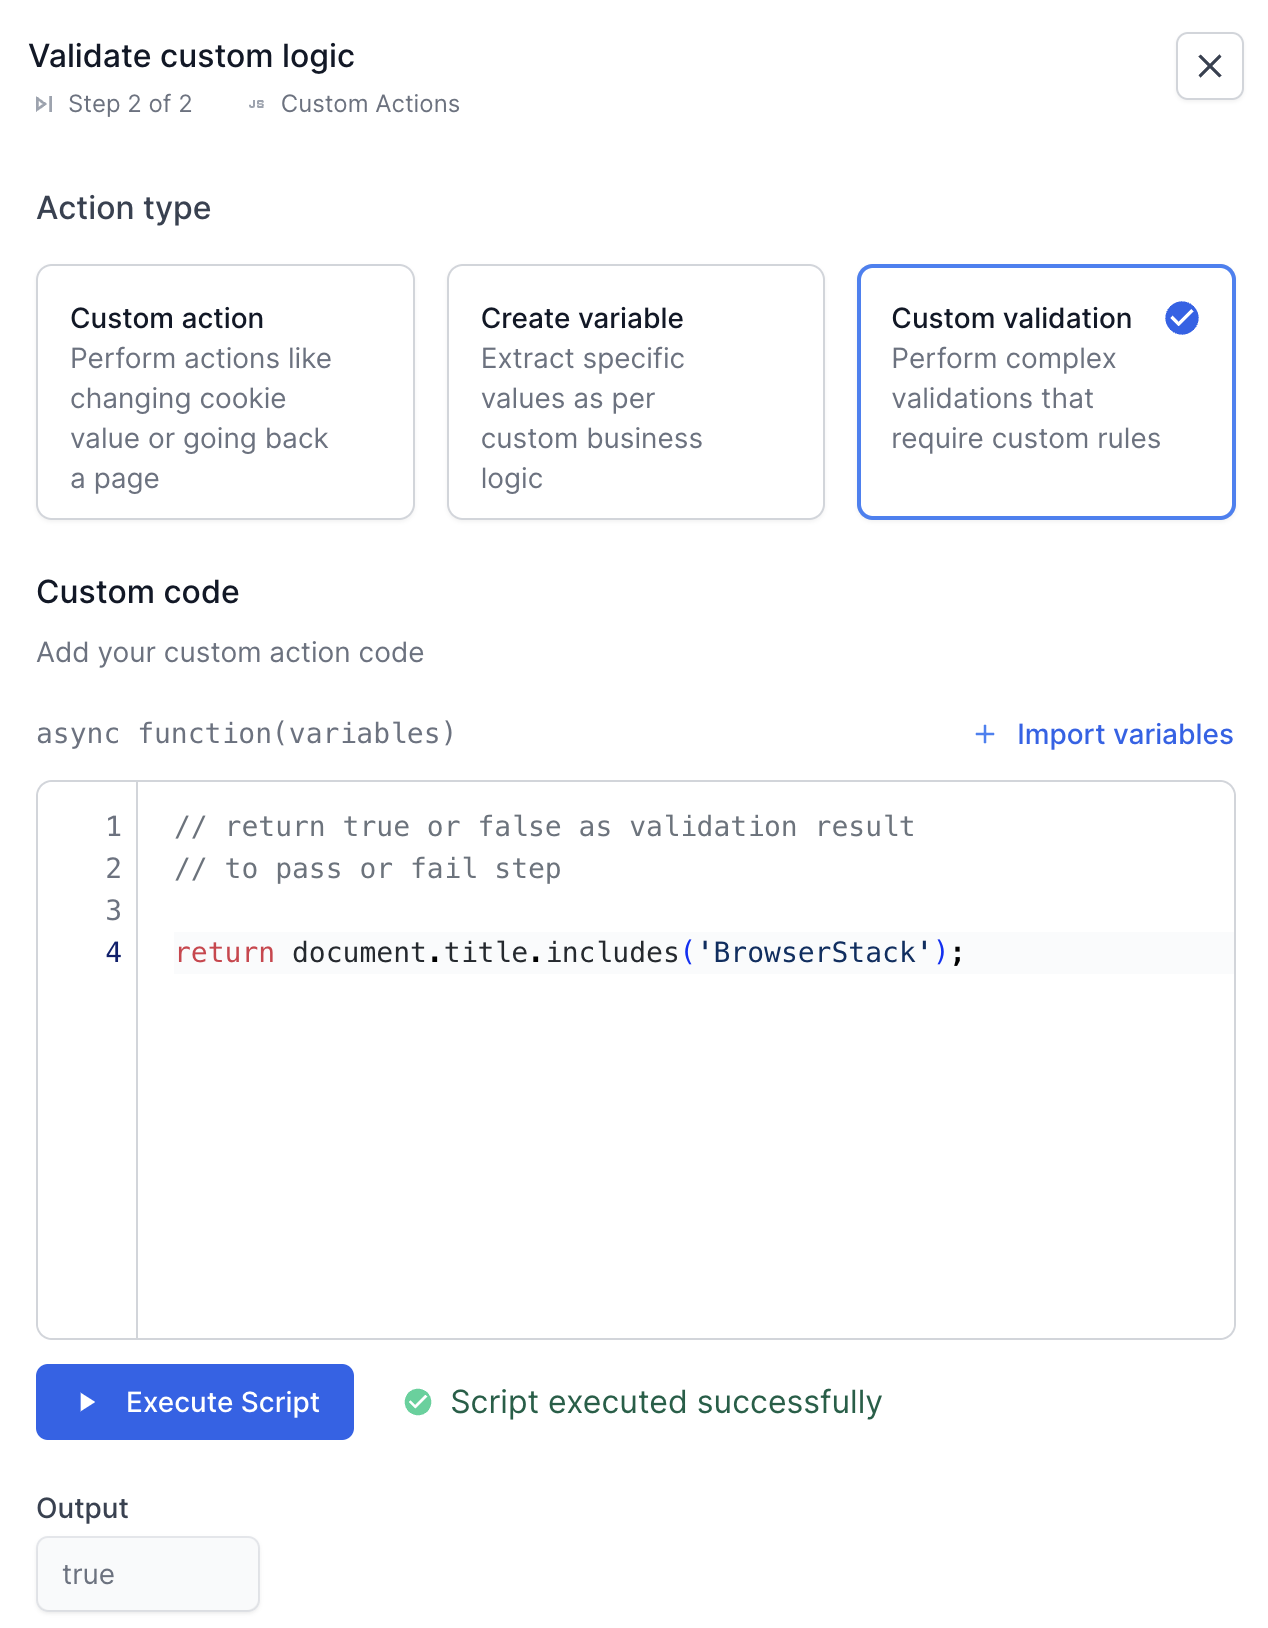
You can click the Execute Script button to execute the step and see the results.
BrowserStack also provides a JavaScript library to simplify the use of custom actions. For more information, refer to the JavaScript library page.
Pass an element to a custom action step
Low Code Automation allows you to pass a web element to a custom action step. You can select an element on the webpage, and the tool automatically generates the correct XPath or CSS selector. Once selected, you can add it to the custom action step. This makes it easy for testers with no technical knowledge to choose elements and add them to the custom action step. Currently, only one element can be passed per custom action step.
- In the custom action pane, click Select element, and then select the desired element on the webpage.
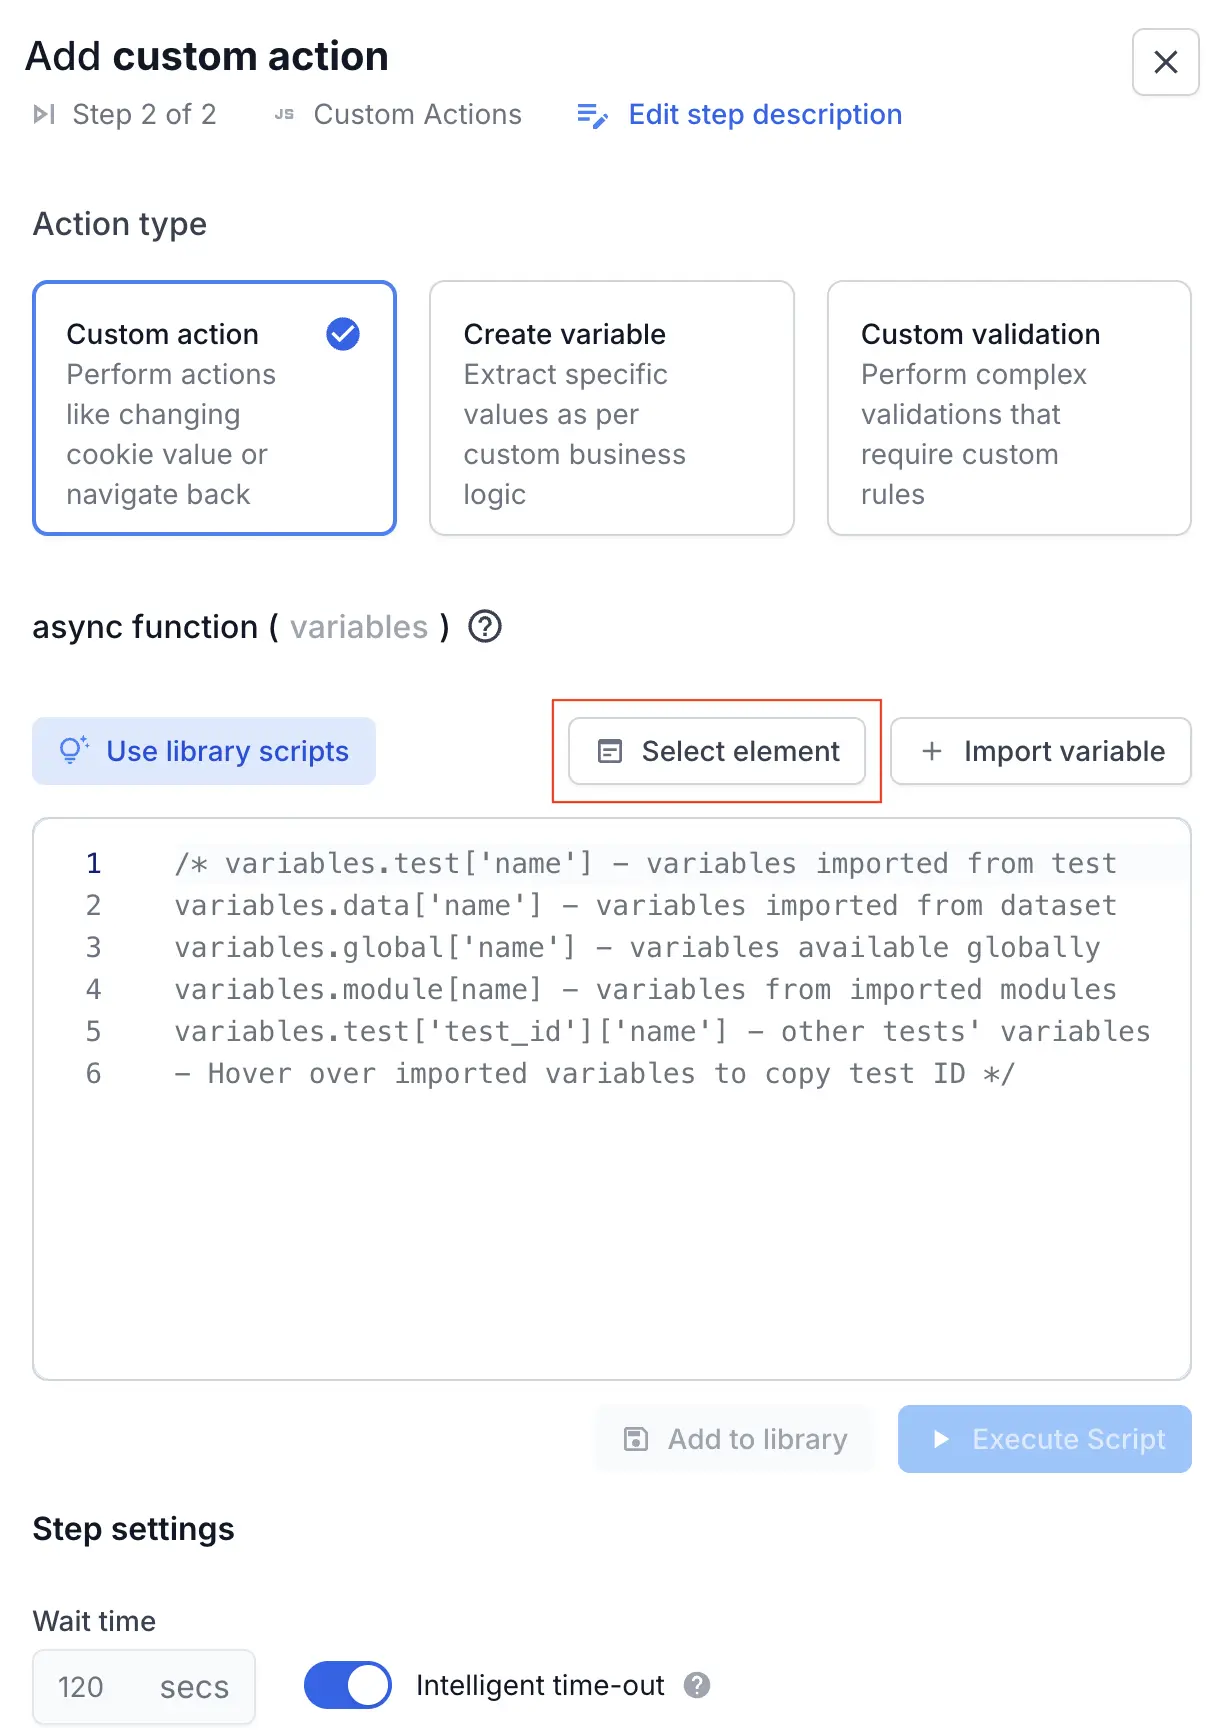
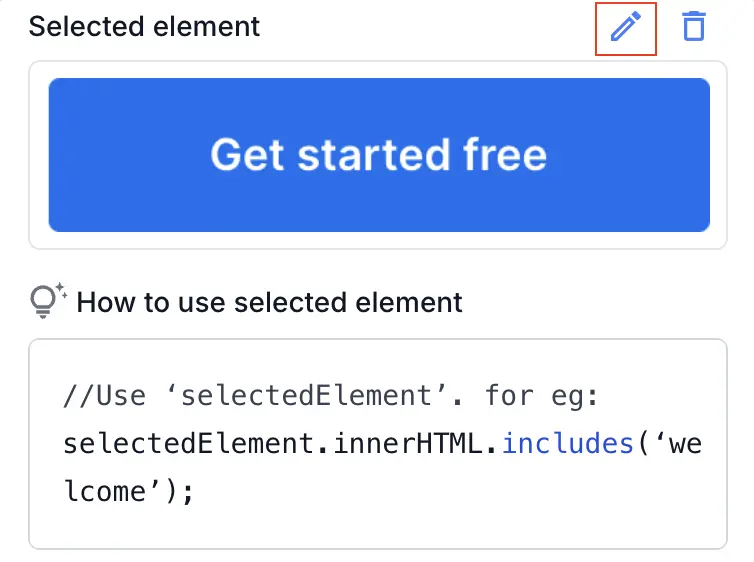
The Selected element window displays the JavaScript code.

- Copy the code, add it to your custom action and modify the JavaScript.
- To reselect the element, click the Edit icon, select the element again, and repeat step 2.
- Click Execute Script.
You can click the Delete icon to remove the selected element.
Variable support
You can import variables of any kind (test, dataset, global or module) into the step. The imported variables can be accessed within the function using the below syntax:
- variables.test[‘variable name’] - For using any variable from the test scope
- variables.data[‘variable name’] - For using any variable from test datasets
- variables.module[‘variable name’] - For using any variable from modules imported in the test.
- variables.global[‘variable name’] - For using any global variable in the test
We're sorry to hear that. Please share your feedback so we can do better
Contact our Support team for immediate help while we work on improving our docs.
We're continuously improving our docs. We'd love to know what you liked
We're sorry to hear that. Please share your feedback so we can do better
Contact our Support team for immediate help while we work on improving our docs.
We're continuously improving our docs. We'd love to know what you liked
Thank you for your valuable feedback!